
Manage Site details
Complete the Site-specific name, tags, assets, and Location information supported by an Element.
Outcome: Complete the Site-specific information on a Site Element and verify its asset and location context.
For: Customer administrators and engineers
Permission: update elements
Time: 5–15 minutes
Changes made: Updates a Site Element and may attach assets
If you're stuck
- Confirm Element Type is Site; Applications and Services do not expose Site-only details.
- Search Site Assets by unique Asset ID to avoid attaching a similarly named record.
- If a location value is rejected, preserve the exact field label and validation message for Support.
Before you start
- Confirm the Element Type is Site.
- Gather approved Site Assets and Location information.
- Check whether the assets already belong to another Site according to your model.
Field and option guide
| UI item | Purpose | What to use | Verification |
|---|---|---|---|
| Site name | Identifies the location-oriented Element | Recognizable location name | Element list and Site details |
| Data Tags | Descriptive Site labels | Existing approved tags | Site details and filters |
| Structure Tags | Hierarchy attachment | Exact existing Structure node | Structure context |
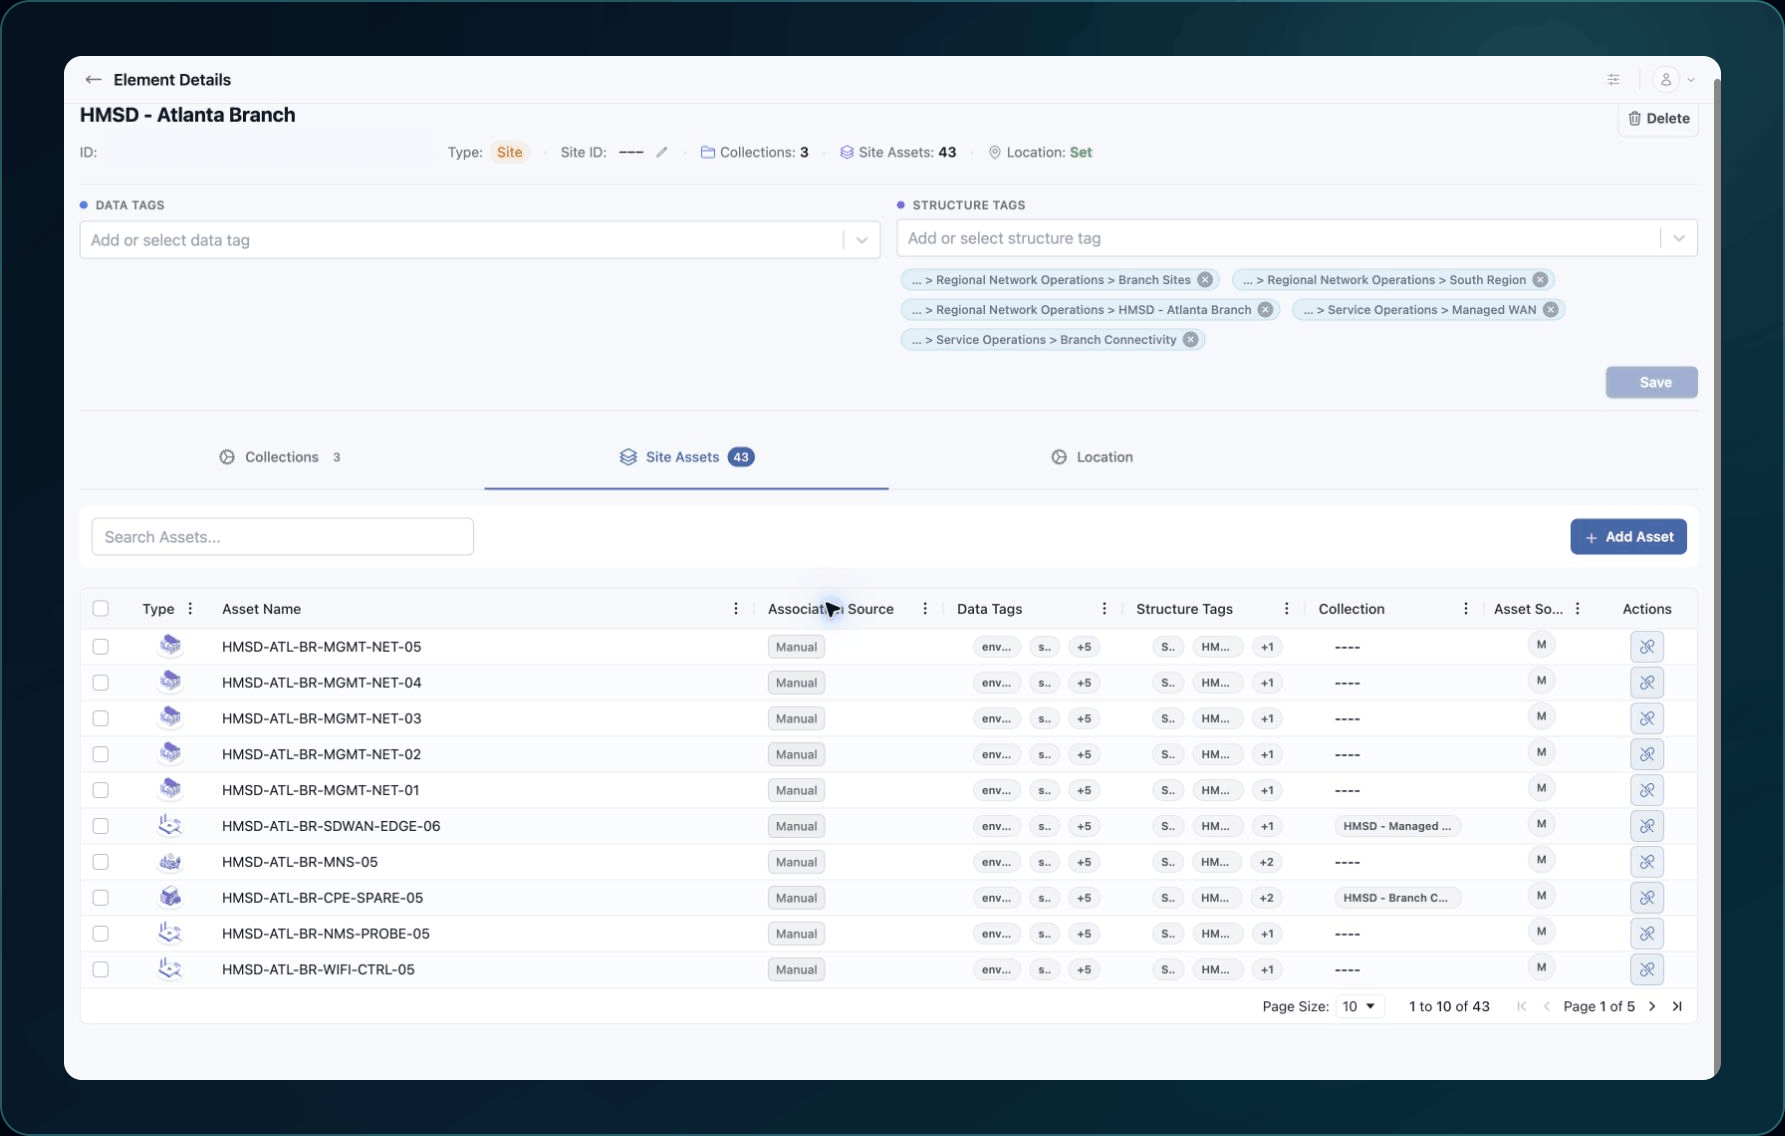
| Site Assets | Assets associated with this Site | Existing Inventory Assets confirmed by unique ID | Site Assets list |
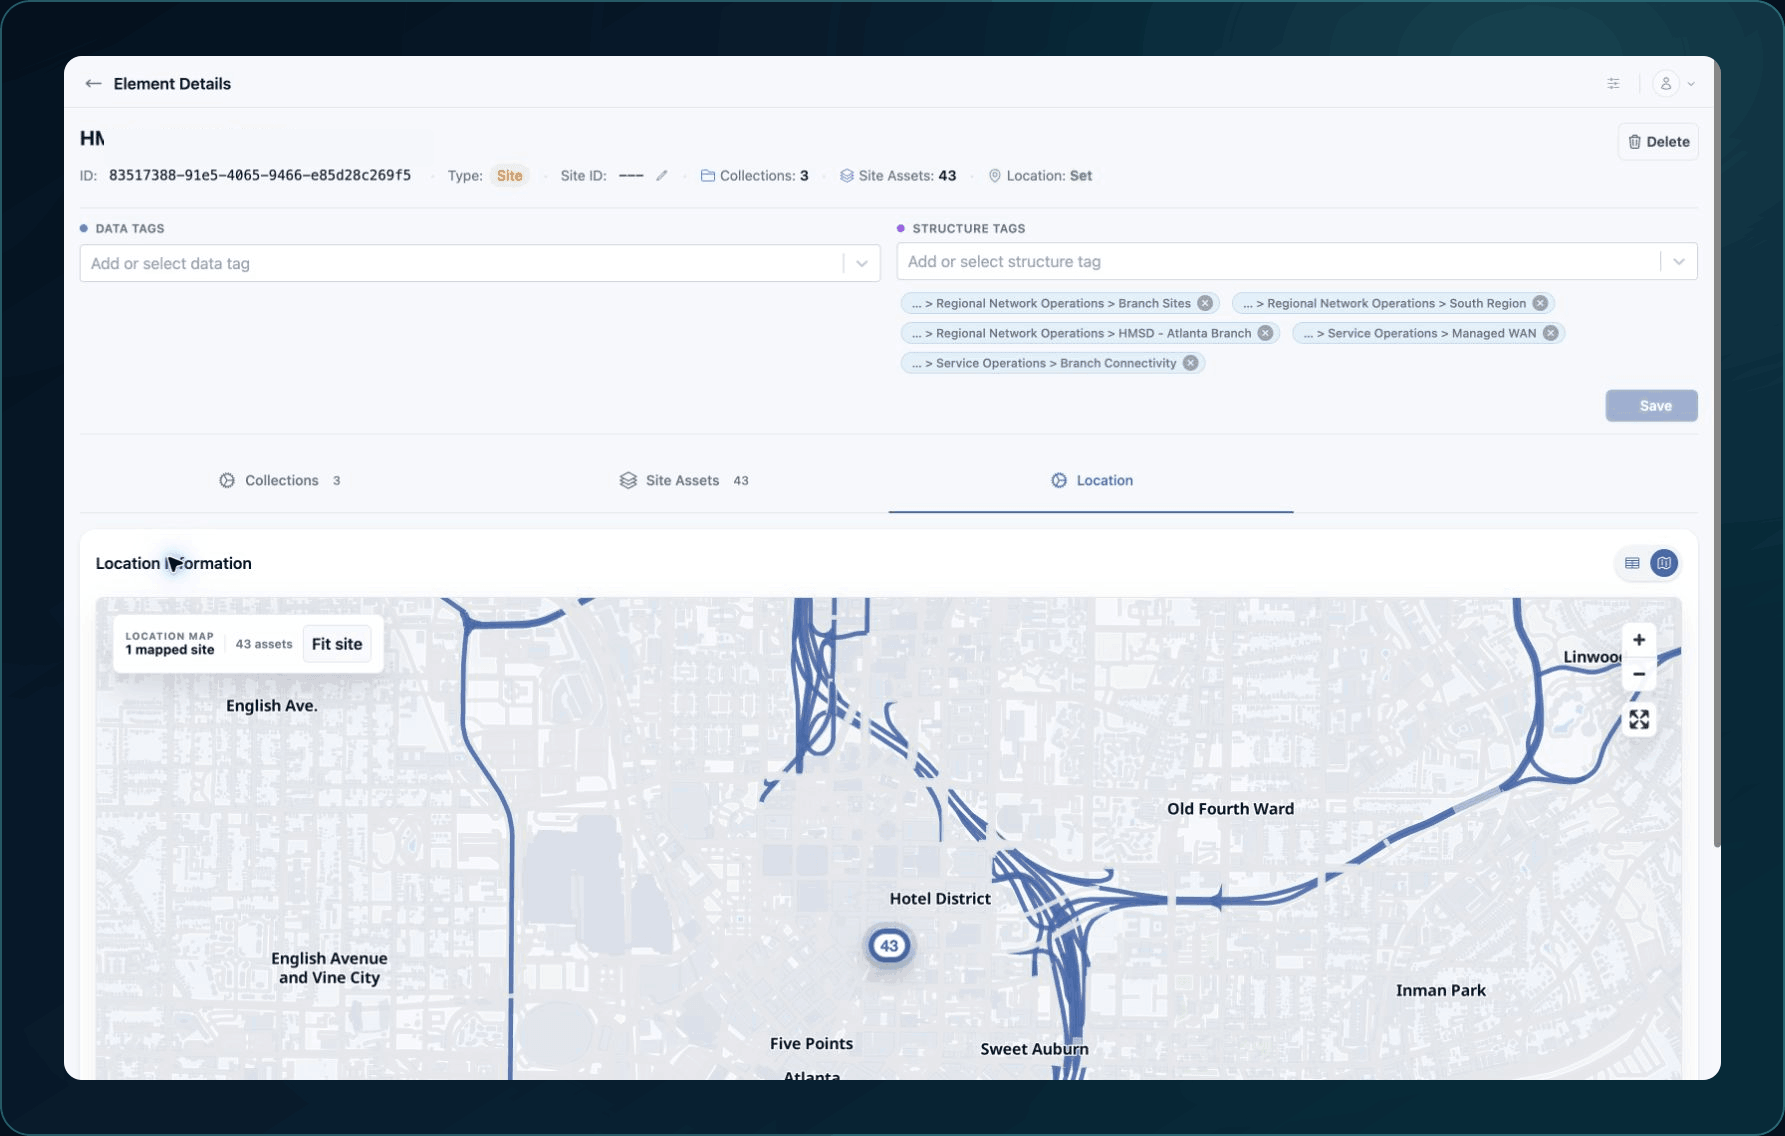
| Location | Structured location information | Approved values for each displayed field | Location tab after refresh |
Complete the Site
- Open Functions → Elements and select the Site.
- Confirm or edit the Site name.
- Add approved Data Tags and Structure Tags.
- Open Site Assets.
- Add the intended existing assets after checking each unique identifier.
6. Open Location.
7. Complete each displayed Location field from the approved location source; preserve the exact label for any field you cannot validate.
8. Save each changed area.
Expected result: The Site shows the intended assets and Location information after refresh.
If Site Assets or Location is missing, verify that the Element is a Site and that your role can update it.
Check your result
Refresh the Site, confirm its tags, open Site Assets, and verify each asset. Then open Location and compare the saved values with the approved source.
Undo this change
Detach an incorrect Site Asset rather than deleting the asset. Restore the previous Location value and save. Review Collections and Structure Tags before deleting the Site.
Learn and continue
- Learn: Understand Structures, Elements, and Collections
- In WanAware: Open
/elements, select a Site, and use Site Assets and Location.
Next steps
Get help
Email [email protected] with your company, affected user, Site ID, affected asset ID, page URL, field label, timestamp and time zone, and expected versus actual result. Never send passwords, credentials, tokens, or secret values.
Updated about 2 months ago